|
Making AGI Backgrounds
From Photos
It's Easy!
A tutorial by Björn Kahlenberg currently developing "V"
Foreword:
Hi everyone and welcome to a small tutorial about how
to get backgrounds for Sierra-AGI-adventures from photos. This technique
is heavily used during the production of our adventure "V", as it allows
us to have actual movie stills as rooms for our game. The only thing you
need (besides Picedit) is a program for editing pictures and a great photo.
This is already the first big issue, because the quality of the photo decides
about the quality of the room.
The most important thing when you choose your photo is that it
must not be too deep in dimensions: If the floor in the photo covers some
hundert square feet and you turn that into an AGI-room, the scene will look
distorted, because the objects in the background get smaller the further
away they are, but the size of the player character stays the same. In our
example, I have chosen a photo from a fire station in Los Angeles. You will
notice that the walkable area is really very small, just some inches to walk
and the rest is just background. That makes turning it into an AGI-room quite
easy.
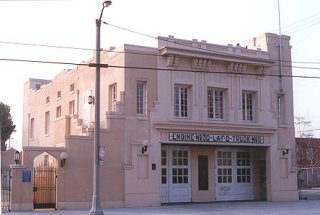
After you have chosen a photo, you have to make sure the proportions of
the photo fit the proportions of the player character. Otherwise a door from
within a photo will be twice as big as the player character. This gives the
scene a distorted look. To give your room the right proportions you have
to experiment around with a photo-editing tool. In my example, I didn't have
to do anything, the photo did already have the right proportions when I saved
it as a 320x200 PCX-file. Otherwise I would have had to make the photo smaller
or bigger. When the photo is made smaller, you will have some areas in the
PCX-file which are just plain white. This is no problem, when these areas
are not too big. In my example, there's something missing on the right side
of the picture:
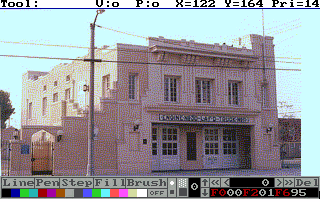
You have to use your imagination for what the photo might look like in
the missing area. When your photo has the right size, convert it to a PCX-file
with a resolution of 320x200 in 256 colors. You then have to copy the file
into the folder where you have Picedit. In my example, the file is called
no30.pcx. Start Picedit with:
C:\picedit.exe picture.pcx
If your picture is called picture.pcx, so that you can have the picture in the background when you draw your room.
In Picedit, it is best to begin with the basic outlines of what is in the picture.
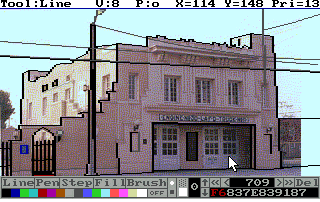
I try to give most of the things in the picture a black outline for contrast
reasons. But this is just my personal taste, you'll have to experiment around
with this. Sometimes it looks quite nice to leave the outlines away, but
if you use no outlines at all, the scene will look quite weird.
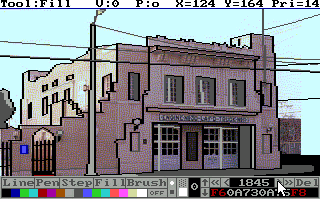
After I've done the outlines, I begin to paint some basic shadings. As
our scene is supposed to be a night-scene, I use mainly black and grey for
this.
Now's the time to decide about some basic colors. As it's a nightly
scene, I've chosen the darker red as primary colour of the house. I can then
use light red for the area where the streetlight is and brown for the darker
side of the house.
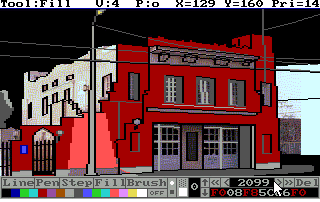
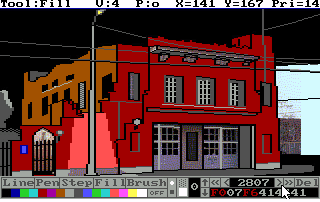
Now there is only one area of the picture missing: the right side where
the photo suddenly ends. I've chosen to take a normal city-skyline for that
area, As I want the player to be able to walk around the right corner of
the house, I had already painted the street leading around the corner. For
the skyline I simply draw some squares...
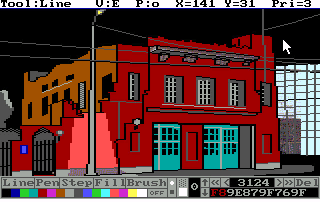
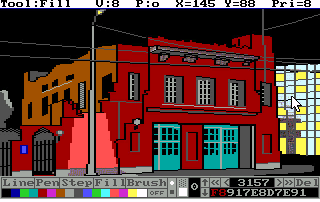
...fill some of them with yellow...
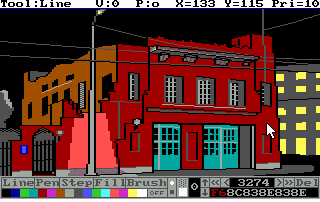
... the others with grey...
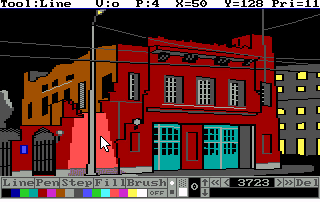
...and then I do some outlines again to finish the scene. Voila.
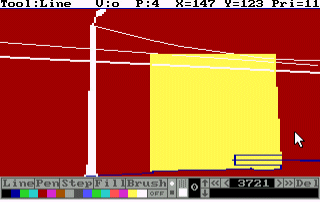
Note that putting the streetlight and the wires to the foreground was in
vain, because the player can't walk behind them. The only important thing
on that screen is the yellow square for the corner of the house.Here is what
the priority screen looks like.
Björn Kahlenberg
Sweet! I never knew it was so easy!! :) - Mods
|

